Nightmare on VPN street with TMG and SSTP – Part 4 of 4

Welcome back to Nightmare on VPN street with TMG and SSTP – Part 4 of 4.  If you’ve been following along, we’re going to use the client to determine the SHA256 value since this isn’t “visible” within the certificate itself.  Then we’ll tackle the subsequent TMG configuration and the testing.

If you want to go back to Part 3Part 2, or Part 1, click respectively.

Here goes:

We should be at the point of being able to connect (and then immediately disconnect unfortunately) with SSTP.  The configuration of my client was straight forward with only a few minor tweaks.  If it was working previously, you need to change NOTHING. Oh, and before I show them to you, make sure you’ve disabled (or more accurately, ENABLED) the NoCertRevocationCheck reg key.  I’ve included the config here for completeness:

  1. Open the Network Sharing Center control panel.
  2. Select “Set up a new connection or network”.
  3. Choose “Connect to a workplace”
  4. Choose Use my Internet Connection (VPN)
  5. Put it the name of your TMG server’s external presence, which should be your certificate’s SUBJECT name, e.g. vpn.domain.com
    1. Note, if you use the IP Address, you’ll get SSL errors, although might still be able to connect.
  6. Select the “Don’t connect now…” checkbox.  Click Next
  7. Put in your credentials and click “Create” then click “Close”.  If you see “connect”, then you didn’t check the ‘Don’t connect now” checkbox.  Either way, it’s no big deal.
  8. Go back to the propertes of the connection you just created.
  9. Under the Security tab, change the “Type of VPN” to SSTP and then click OK.  This will allow the connection to happen faster instead of RRAS trying PPTP first, timeout, try L2TP second, timeout, before trying SSTP.

Now, here’s where we “find” the SHA256 hash value.

  • Double click the VPN connection you just created and click connect – you should see it trying to connect, authenticate, then really connect – then almost immediately disconnect.  Click ok.
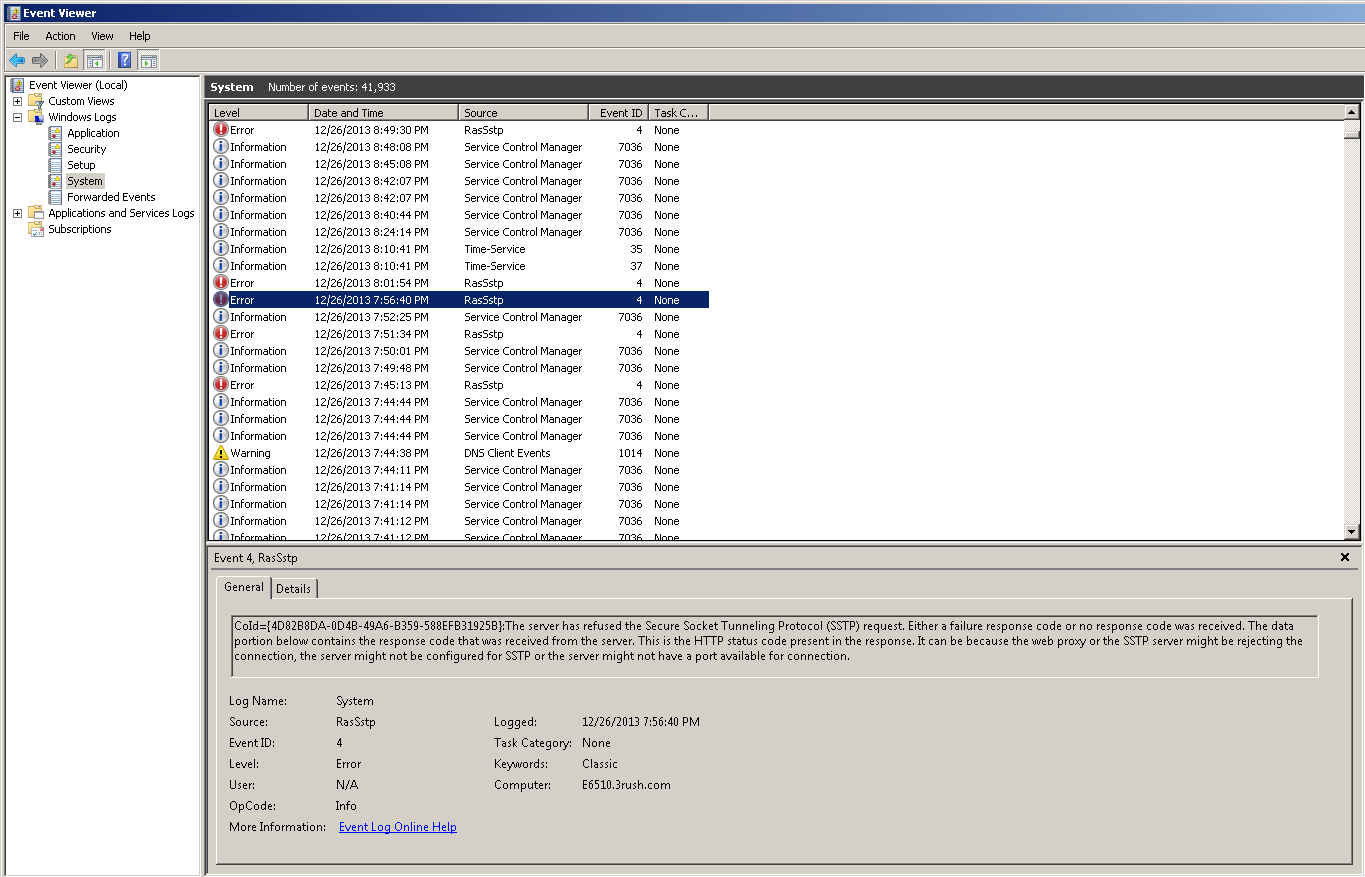
  • Now, open Eventvwr on the client and look for this error Event ID 6 – RrasSstp
    Note: I blacked out most of the key for security, but left you the ‘view’ so you know what to look for.
    EventID6 Finding SHA256 value
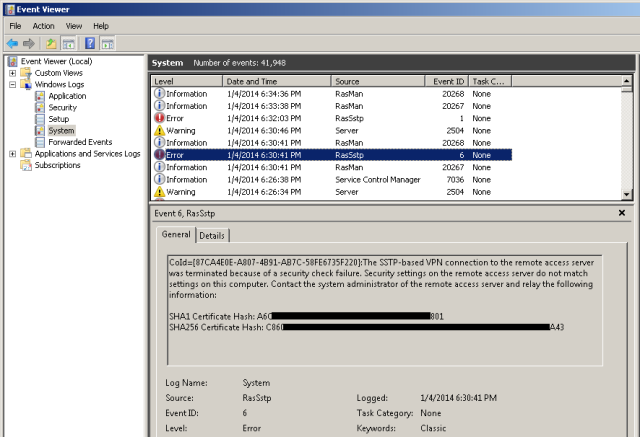
  • OK, so what you’re seeing in the eventvwr is the SHA256 value that is the ACTUAL CORRECT value.  We’re going to take this value and change the DUMMY SHA256 value that is in the registry on the TMG 2010 server.
  • You can either manually do it using regedit, or use the command line like this:
    • reg delete HKLM\SYSTEM\CurrentControlSet\Services\SstpSvc\Parameters /v SHA256CertificateHash /f
    • reg add HKEY_LOCAL_MACHINE\SYSTEM\CurrentControlSet\Services\SstpSvc\Parameters /v SHA256CertificateHash /t REG_BINARY /d this_is_the_SHA256_hash_value_you_copied_from_the_eventlog_on_the_client /f

At this point, I recommend rebooting the TMG server and making sure everything comes back relatively clean.  You should no longer see the Schannel errors nor the RRAS SSTP Event ID errors 18 or 19 since the hashes are now correct in the registry for SHA1 and SHA256.

Now you should be able to connect from your client using the SSTP VPN connection and STAY connected.

I hope this helps anyone out there save some time with it comes to replacing computer certificates on TMG 2010!

Posted in Computers and Internet | Tagged , , , , , , , , , , , , | Leave a comment

Nightmare on VPN street with TMG and SSTP – Part 3 of 4

Welcome back to Nightmare on VPN street with TMG and SSTP – Part 3 of 4.  If you’ve been following along, we’re going to configure the TMG server to remove the old cert/listener and replace it with the new cert/listener.

If you want to go back to Part 2 or Part 1, click respectively.

Here goes:

Now that we have the certificate installed in the Computer account of the TMG server, now we have to clean up TMG first, then reconfigure TMG to use the new certificate as well as manipulate the registry.

Step 1:  Delete the certificate

  • Go right back to the Computer certificate store and remove the certificate.  There are other ways to expire the cert, etc, and I just chose to remove it.  YMMV
  • Go to the TMG administration tool and click the Web Listeners under Network Objects
  • Get the properties of the web listener and select the Certificates tab
  • Under “use a single certificate for this Web Listener”, choose the Select Certificate button and choose your newly created certificate and press the Select button when done.  Then you’ll need to click Apply on the TMG main page.

Web Listener page

With that done, it’s time to move on to the HARD part.  This is the area where most of my time was spent troubleshooting and researching and doing more troubleshooting.

The trick here is to look in the registry and see that there are hashes in the following key:
HKLM\SYSTEM\CurrentControlSet\services\SstpSvc\Parameters

Old SHA1 and SHA256 values

In my case, these values were here – but were the expired ones – further, TMG nor the OS doesn’t update them.  This is why, although I had a new certificate, SSTP was failing.  Also, deleting these keys and restarting the server will NOT register the new certificate here.  This is something you would expect to work – after all, when I did the first certificate way back in 2010, I didn’t have to touch this at all.  Hence the confusion and difficulty troubleshooting.  Kudos to Amit Kumar’s blog post that led me in the right direction eventhough it wasn’t exact the solution to my problem.

So here was my next few steps:

  • netsh http delete ssl 0.0.0.0:443netsh http delete ssl [::]:443reg delete HKLM\SYSTEM\CurrentControlSet\Services\SstpSvc\Parameters /v SHA256CertificateHash /f

    reg delete HKLM\SYSTEM\CurrentControlSet\Services\SstpSvc\Parameters /v SHA1CertificateHash /f
  • Reboot the server – you will get some errors upon reboot in the eventlog about Event ID 18 and 19 and not being able to find SHA256 and SHA1 certificates, etc.  That’s ok.  This is basically telling you those two reg entries above are missing or are wrong.  Here’s the error:SHA256 Evend ID 18 Error SHA1 Evend ID 19 Error
  • Next, doing the following command will show if there are bindings or not.
    netsh http show ssl
    If there are bindings, then make sure they’re the new cert.  If there are no bindings, good.
    netsh http show sslc(or they’re the old cert bindings, delete them again.)
  • Now we need to add the SHA1 bindings (you did copy them from the certificate you created in Part2, right?  :>)  – you cannot add the SHA256 bindings (YET) because we don’t know the hash for SHA256 (see later in part 4).
  • Here’s what that commands look like
    reg add HKEY_LOCAL_MACHINE\SYSTEM\CurrentControlSet\Services\SstpSvc\Parameters /v SHA1CertificateHash /t REG_BINARY /d 50fd47d6fa1436c047e6a7b388b5fc2e9efd6c49 /f
  • Also, while were here, we need to add a DUMMY SHA256 hash (remember we don’t know the real hash yet).  Here’s the actual dummy hash I added – note the SHA256 is longer than SHA1 (making it stronger):
    reg add HKEY_LOCAL_MACHINE\SYSTEM\CurrentControlSet\Services\SstpSvc\Parameters /v SHA256CertificateHash /t REG_BINARY /d d075f96f979fd4df20f3fdf7a5335807879ca627e5f3fc0bab7a7ac067c831c6 /f
  • Now, we need to make sure we BIND the SHA1 hash to the TMG nic(s) both to the IPv4 interface and the IPv6 interface.  Keep in mind that the appid is the same for all RRAS SSTP implementations (it would appear according to Amit Kumar):
    netsh http add sslcert ipport=[::]:443 certhash=50fd47d6fa1436c047e6a7b388b5fc2e9efd6c49 appid={ba195980-cd49-458b-9e23-c84ee0adcd75} certstorename=MYnetsh http add sslcert ipport=0.0.0.0:443 certhash=50fd47d6fa1436c047e6a7b388b5fc2e9efd6c49 appid={ba195980-cd49-458b-9e23-c84ee0adcd75} certstorename=MY
  • Now at this point, we need to restart basically everything – I just rebooted my TMG server.  However, it appears you might be able to just restart the SSTP Service which will, in turn, restart 6 or  other services related to this event.  A reboot felt cleaner to me :>)

Now we’re off to Part 4.  You can click here to get there.  In Part 4, we’ll use a client to try to connect to the TMG server using SSTP – it should connect, then disconnect.  [There are a bunch of google entries out there but none really address the underlying problem – a bogus or missing SHA256 entry – we’ll address this next].

Posted in Computers and Internet | Tagged , , , , , , , , , , , , | Leave a comment

Nightmare on VPN street with TMG and SSTP Part 2 of 4

Welcome back to Nightmare on VPN street with TMG and SSTP – Part 2 of 4.  If you’ve been following along, we’re going to configure the TMG server to request a new certificate from the internal CA.

If you want to go back to Part 1, click here.

Here goes:

So here’s my take and process on this issue.  Once your certificate expires on TMG, you’re basically hosed as the replacement process appears to be manual.

  1. If you change out the certificate in the web listener, that’s a good start – but will not work if you don’t do other things.  TMG will not properly remove your old certificate from the registry and will not properly register the new certificate into the registry.  This is a frustratingly manual process.
  2. You cannot find the SHA256 hash easily (required to register it to TMG and required for Windows Vista clients and higher).  This is a pseudo chicken and egg issue.
  3. There are many hours (40+) that went into mr resolution which will take you about 10 minutes to fix once you know what’s specifically wrong and what specifically to fix.
  4. The event logs are of no help in problem definition.  They will help right near the very end though in terms of figuring out the SHA256 hash.

Here goes:

  • I started getting Event ID Error 4 on the client and also received an error message from the SSTP dialog box when trying to VPN in.

Client Eventlog error 01

  • The TMG server was already getting certificate expired in the Application Log (or about to expire) errors – event ID 64 below:

TMG Certificate expired error 01

  • In the TMG System Log, the common Schannel error was ever present whenever the client tried to make a connection to it event ID 36888 :
  • TMG SChannel error 01I also got a bunch of RasSstp errors Event ID 18 as well as Event ID 36886 Schannel errors which basically mean that your certificate doesn’t work and/or is not properly registered or just isn’t installed.  THIS IS THE CRUX OF THE PROBLEM.

TMG RemoteAccess and Schannel errorsNow to the solution:

  1. Issue a new certificate either from a 3rd party CA or from your own internal CA.  I used an internal CA and use the following procedure to do so:
    1. Go to your TMG server and do Start–>Run–>mmc
    2. On the File menu, click Add/Remove Snap-in.  In the list of available snap-ins, click Certificates, and then click Add.
    3. Click Computer account, and click Next.
    4. Click Local computer, and click Finish.
    5. Click OK.
    6. In the console tree, double-click Certificates (Local Computer), and then double-click Personal.
    7. Right-click Personal, point to All Tasks, and then click Request New Certificate to start the Certificate Enrollment wizard.
    8. Click Next and Next again.
    9. Select the Web Server template or custom template you may have created like I have.
    10. Click the warning icon below More information is required to enroll for this certificate. Click here to configure these settings.
    11. In the Subject name area under Type, click Common Name.
      In the Subject name area under Value, enter the fully qualified domain name of the server, and then click Add.  (This is important to choose the name your VPN client will connect to externally.  Whether it’s VPN.domain.com or something else.  This is also the place to add other alternate DNS names.  Please see my screenshot for details.
    12. Certenrollment01
    13. In the Alternative name area under Type, click DNS.  In the Alternative name area under Value, enter the fully qualified domain name of the server, and then click Add.
    14. Repeat steps 17 and 18 above for each additional SAN that you require. Click OK when finished.
    15. I added a friendly name and description as well as validating the following selections were chosen in the print screens.  Remember The private key must be exportable. To specify that the private key is exportable, click the Private Key tab, click the Key Options arrow, and click Make private key exportable. The CA must also be configured to support exportable private keys.Certenrollment02
    16. Certenrollment05Certenrollment04Certenrollment03
    17. Click EnrollAfter enrollment succeeds, click Finish:
    18. Certenrollment06
    19. Click “View Certificate”, Details and scroll down to Thumbprint.  That thumbprint will be of critical importance to this process.
    20. CertThumbprint 
    21. Now, we’ll want to export this key and install it on our client (in the Computer\Personal store) that we’ll be using to test connectivity with.
      1. Click Copy to File
      2. Make sure to export the private key
      3. Select “Include all certificates in the certification path if possible” and “Export all extended properties”
      4. Give it a password
      5. Give it a filename and location
      6. Then click Finish
      7. Copy the .pfx file to your client
      8. Right click the file and choose “Install PFX”
      9. Put in the password and select the “Make this key exportable” and “Include all extended properties” checkboxes. (the latter should be selected by default)
      10. Choose ‘Place certificates in the following store’ and select ‘Personal’
      11. Click Finish
      12. Open the MMC for certificates –> Computer and make sure the key is in the Personal>Certificates folder for the Local Computer account.
      13. Alternatively, you can open the Certificates snapin for the Local Computer account and choose “import”, find the file and go through the above steps.
    22. At this point, you’ll want to copy and paste the SHA1 value into Notepad ++ – I’ve attached a print screen of the various commands that were used – not all were included, but it’s a pretty good list:
    23. Notepad++ command file

Here’s the text I used as well:

HA1 Thumbprint for server certificate:
50 fd 47 d6 fa 14 36 c0 47 e6 a7 b3 88 b5 fc 2e 9e fd 6c 49
50fd47d6fa1436c047e6a7b388b5fc2e9efd6c49

Commands saved (no particular order):

netsh http show sslcert
netsh http delete sslcert ipport=[::]:443
net start remoteaccess
net stop sstpsvc /y
netsh http show ssl
netsh http add sslcert ipport=[::]:443 certhash=50fd47d6fa1436c047e6a7b388b5fc2e9efd6c49 appid={ba195980-cd49-458b-9e23-c84ee0adcd75} certstorename=MY
netsh http add sslcert ipport=0.0.0.0:443 certhash=50fd47d6fa1436c047e6a7b388b5fc2e9efd6c49 appid={ba195980-cd49-458b-9e23-c84ee0adcd75} certstorename=MY
reg delete HKLM\SYSTEM\CurrentControlSet\Services\SstpSvc\Parameters /v SHA256CertificateHash /f
reg delete HKLM\SYSTEM\CurrentControlSet\Services\SstpSvc\Parameters /v SHA1CertificateHash /f
netstat -aon |findstr 443

Please go on to part 3 of Nightmare on VPN street with TMG and SSTP.

Posted in Computers and Internet | Tagged , , , , , , , , , , , , | Leave a comment

Nightmare on VPN street with TMG and SSTP Part 1 of 4

The day started out like any other where I was working remotely and needed to get some files from my house.  I had setup a TMG 2010 server as my internet gateway and front end firewall approximately 2 years ago.  It was a build and swing from ISA 2006.  The ISA 2006 server allowed L2TP VPN.

The only issue I had was many companies block that outbound – so I couldn’t VPN into my home network.  Never, TMG 2010 is (was) here and it offered SSTP capability.  Whoo hoo!

I set TMG 2010 up and configured it using my internal Microsoft CA and was off to the races.  The only glitch I ran into was something called the NoCertRevocationCheck issue on the client.  Enabling this allowed everything to work.  Here’s the Microsoft link with the key name.

Fast forward to NOW.  My 2 year internal certificate had expired and my VPN client could no longer login using SSTP.  This is where the ‘fun’ starts.

I’ll start off by giving credit to the blogs/posts/webpages that helped me figure out how to fix this issue:

  1. Thanks to Amit Kumar, a software design engineer at Microsoft.  This article was instrumental in getting me on the right track:
    1. http://blogs.technet.com/b/rrasblog/archive/2007/11/08/do-you-want-to-change-the-certificate-used-by-the-sstp-server-read-how.aspx
  2. Microsoft article “How to restrict SSTP connections to a specific IP address in Windows Server 2008
    1. This article was the last piece of the puzzle I needed.
  3. Microsoft article “How an IIS Web server and a Secure Socket Tunneling Protocol (SSTP)-based Routing and Remote Access server can co-exist on a Windows Server 2008-based server
    1. Although IIS had nothing to do with my issue, there were pieces of information here that helped me work through various scenarios of how SSL works on a VPN connection.
  4. Brian Reid had a nice post on the process what was tangentially related to my issue:
    1. configuring-sstp-vpn-on-small-business

This blog process and resolution will be broken out into the following posts:

Post 1:  This one – the lead up to the issue and credits

Post 2:  Some background and the generation of the new certificate from the TMG 2010 server to the internal Microsoft CA.

Post 3:  The configuration of TMG, the removal of the old cert and reg entries, the addition of the new certificate.

Post 4:  Using the client to determine the SHA256 value since this isn’t “visible” within the certificate itself.  Then the subsequent TMG configuration and the testing.

Please see part two to continue.

Posted in Computers and Internet | Tagged , , , , , , , , , , , , | Leave a comment

The case of VMNAT.exe consuming too many CPU cycles – unsolved

For at least a year I’ve been plagued – ok, maybe that’s too strong of a word – annoyed by the fact that when running VMware Workstation (I’m using Workstation 9 in this case, but it also happened to me in version 8) my laptop “host” would show VMNAT.exe would randomly consume many cpu cycles for no obvious reason.

The usual fix for me is to open Task Manager and kill VMNAT.exe.  This was a pretty good work around as it wouldn’t cause issues for the VM that was running – VMNAT.exe would respawn almost immediately and work properly for while.

Today, I had some time so I decided to put on my Mark Russinovich hat and open up Process Explorer (can be downloaded here) and see what was going on at a deeper level.  Here’s what I found:

  1. First, VMNAT starts getting wacky – I have an 8 core system so 13% is pretty close to chewing up what amounts to a whole core.

Process view 13 percent

2.  Delving deeper with Process Explorer we can see two threads chewing up CPU cycles:

Process Explorer - vmnat threads - unpaused mswsock.dll

3.  Since those two culprits are part of the VMNAT.exe cpu issue, I took a look at Task Manager once more to see the threads running:

Performance view CPU graph

4.  I started to tinker with the Suspend/Resume feature of the threads – I’ll save you all the permutations, but basically suspending mswsock.dll calmed down vmnat.exe.

Process Explorer - vmnat threads - paused mswsock.dll

5.  However, it also had another deleterious effect – it stopped the VM from communicating.  I had a continuous ping going from the VM to the Laptop host to see the suspension of networking.

Process Explorer with ping view

So at this point, I’m not sure how to proceed.  VMNAT is calling MSWSOCK.dll and that’s where the issue begins.  I’m not about to do any serious debugging as those days are behind me :>)

I’m figuring this is a Microsoft issue but can be swayed that it’s a VMware issue.  I guess I’ll just keep my old trick of killing vmnat.exe and letting it respawn itself.  I did find these articles but, unfortunately, they didn’t really help.

I also recognize that my post isn’t helping either – I guess I’m just adding some commentary to the issue.  If anyone has any pointers or fixes, I’ll post it here!

In the meantime, if I have more time, I’ll open a ticket with VMware.

Thanks!

Posted in Uncategorized | 1 Comment

Major issues – vSphere Upgrade to 5.5 from 5.1

I’m writing this today to have some place to refer back to in order to remind me how painful this process was – and how much I love snapshot technology.

Task: Upgrade Home Lab vCenter 5.1 to vCenter 5.5

Issue: Strange errors that show up during the simple or custom upgrade / install process.

Workstream:

  1. Take a snapshot of vCenter “before 5.5 upgrade”
  2. Run vSphere 5.5 installer –> select Custom Install –> select vCenter SSO
  3. This is where it get fun:
    1. You’ll get a popup that yells at you to make sure your SSL certificate (in my case, default cert) is valid.  (That’s right, the installer doesn’t check this out for you)
    2. Then there is a weird error that it cannot export data.  “There was an error while exporting data.  Installation can continue without migrating existing data.  Do you want to continue.
      1. I decided to look into this.  Turns out this error only applies to an SSO Multi-site environment.  So the installer apparently ASSUMES a multisite environment – poor programming.
      2. Here’s how I figured that out:
        SSO Replication CLI error
      3. In this case, the “unsupported operation” means that it errored out because I don’t have a multisite setup.
    3. At this point the installer proceeded and said it was “successful”.
    4. Now I went to install the web client next.  I got through to this screen when it errored out:
      1. WebClient Error - cannot login to SSO
      2. This was maddening – I checked everything.  I then rebooted and tried again.  No Dice

—————————————————————

I’m skipping many troubleshooting steps at this point.  I spent about 5 hours nonstop digging through a dozen (maybe two dozen) articles from VMware site to personal blogs, etc.

—————————————————————

At the end of the day, here were the issues I’ve run into:

It appears my upgrade woes are caused by the installer not being able to handle the certificates (self signed in this case) properly.  After I manually uninstalled the SSO and Web Client pieces first, I was met with a different (read much better) result.  See below:

After Manual Uninstall of SSO certificate thumbprint shows

So this is proof positive that the installer is choking on the existing certificates during the upgrade.

Now that the SSO installed properly (remember it did NOT UPGRADE properly) Installer the Web Client Install worked – and note below that the web client is hammering the java.exe piece for about 5 or so minutes (in task manager) – this is good news and to be expected:

Web Client Install successful - java high cpu

Note, now that this installed properly, the Inventory service installed properly and the self signed cert showed up (yay):

Inventory Service Self Signed Cert success

Then I ran into more issues that I just clicked through (boo):

Inventory Service failed to register

Then just when you think it’s looking good when upgrading vCenter:

vCenter Server Self Signed Cert

This happened:

vCenter Server - Could not delete Webservices

Then this:

vCenter Server could not unregister solution user

Once I clicked through all of these and tried to log in to the web client, I got this:

Could not connect to Web Client

Then this:

Web Client Could not retrieve navigation path

I also ran into this issue:

https://www.vmware.com/support/vsphere5/doc/vsphere-esx-vcenter-server-55-release-notes.html#knownissues
After upgrade, domain administrators, who are part of the local administrators group, cannot log in to vCenter Server In your vSphere 5.1 environment, you gave permissions to the local administrators group, which implicitly includes the domain administrator group. You can log in to vCenter Server 5.1 as a member of the domain administrator group. However, when you upgrade to vSphere 5.5, the domain administrator users no longer have the permissions to log in to vCenter Server. Permissions for local users are maintained after the upgrade.

Workaround: The simplest solution is to log in to vCenter Server as administrator@vsphere.local and to assign permissions directly to the domain administrators group. If other local users who were not inside a subdomain had permissions to manage to vCenter Server users before the upgrade, those users can also log in to vCenter Server and assign permissions to the domain administrators group or any other group.”

So I had to login back in as Local Administrator (changed in 5.5 from admin@System-Domain to administrator@vsphere.local (why this change VMware?):

ESX client - had to add back groups

And for the final horribleness of this upgrade, two of the plugins were failing – I spent about 30 minutes trying to figure out how to get them to work, but gave up:

Plugin Manager plugins not working after upgrade

So at the end of the day, I just “reverted to snapshot” because I was exhausted at how disjointed and cumbersome the upgrade to 5.5 was.  Make sure to let this article sink in at how many issues you’ll come across.  And for the record, this was my home lab – I can’t imagine the egg I would have had on my face if this was a customer production environment.

Incidentally, yes, I’ll be telling my existing customer to “hold off” on the upgrade.  It’s not ready for prime time.

Posted in Uncategorized | Tagged | 1 Comment

My MultiFunction Printer (MFP) no longer scans to email

Thanks Comcast!

In all serious, it’s probably a good idea for Comcast to block port 25 for residential subscribers (due to the bots and other attack vectors for spammers and malware purveyors) but that left me with a conundrum.  No scan-to-email capability.

This used to work – but back in March of 2013 or thereabouts, Comcast closed down the port.  The other issue is that the Dell MFP 3115cn can only be configured to use port 25 to send email (technically it can also use 5000-65535, but that’s useless).

Using this thread and many other’s I’ve finally solved the problem for my Dell 3115cn MFP to “scan to email”.  First, kudos to the following threads which I used to fashion my solution:

  1. http://fmuntean.wordpress.com/2008/10/26/how-to-configure-iis-smtp-server-to-forward-emails-using-a-gmail-account/
  2. http://forums.comcast.com/t5/E-Mail-and-Xfinity-Connect-Help/Port-25-no-longer-works-not-using-Comcast-mail-server-have-my/m-p/1846837#M244637

Issue 1: Comcast shut down port 25 for residential broadband subscribers
Issue 2: the Dell MFP does not have the facility to change to secure email ports.  Only 25 and 5000-65535

Partial solution:  Call comcast as stated above – they will provide an exception but do not guarantee how long the exception will last as they automate the closing of port 25 on some undefined audit basis.

Real solution:  I’ll be the first to admit that not everyone can do this BUT, if you’ve got an internal windows server or other free SMTP server software you CAN do this.

  1. Configure your SMTP server this way.  I use a windows server internally.  The same configs will apply to free SMTP servers though
    1. http://fmuntean.wordpress.com/2008/10/26/how-to-configure-iis-smtp-server-to-forward-emails-using-a-gmail-account/
      • Remove default relay restricton
      • Go to Outbound Security Tab and configure basic authentication with your gmail or comcast account
      • Check the TLS encryption box
      • Go to Outbound Connections Tab and change the port to 587 (from the default 25)
      • Go to the Advanced Tab and put in your “smart host”.  In my case it was smtp.gmail.com
        • Note you don’t have to change the FQDN (which in Windows is the host you’re configuring for SMTP)
  2. Configure your MFP to use your new internal server you just created above.
    • In my case, on the Dell 3115cn, the following fields were configured:
      • Primary SMTP Gateway:  10.10.10.200 (this is the internal SMTP server you just configured)
      • SMTP Port #:  25
      • Email Send Authentication:  *Invalid (I did not require internal authentication on the internal SMTP server so none is required here)
      • SMTP Login User:  An internal domain account (you probably don’t need this, but I didn’t test otherwise)
      • SMTP Password: password for SMTP login user (again, you probably don’t need this)
      • Reply address:  mygmailaccount@gmail.com

I tested this and it worked FIRST SHOT!

This will allow you to bypass the ridiculous code restriction on the MFP Dell’s that will not allow port anything other than port 25 outbound.

My wife is thrilled that scan to email works again!

Posted in Uncategorized | Leave a comment

UPDATE – FIX – “a website is trying to start a remote connection”

UPDATE!

Hi All,

If you’ve been following this thread, you’ve already seen my solution below to uninstall KB2592687 in order to remove the security error from RDP’ing into a Windows Server.

The real issue I was having was that my mRemote client wasn’t passing the “new” control that MSTSC is looking for.

The new updated solution (for me at least) was to stop using mRemote and start using mRemoteNG that can be downloaded at this hyperlink.

Please note the instructions on how to copy and paste the XML files needed to migrate your old mRemote connections to mRemoteNG.

This has stopped the error and you no longer have to uninstall KB2592687 to remove the error.

Cheers!~


——————————————————————————————————

Hi All!

Recently I updated my workstation using Microsoft Update.  The next day , a curious thing started to happen.  When I was using mRemote to RDP into some servers, I started getting popups that said “a website is trying to start a remote connection”:

Figure 1

I would allow the process and connect normally.  However, this was beginning to get QUITE ANNOYING.  I found this blog on CodePlex that summarizes it nicely although it took me a while to find it.

Here’s the jist (from Microsoft):
This article discusses the Remote Desktop Protocol (RDP) 8.0 update that enables you to use the new Remote Desktop Services features. These features were introduced in Windows 8 and Windows Server 2012 R2. These features are now available for computers that are running Windows 7 Service Pack 1 (SP1) or Windows Server 2008 R2 Service Pack 1 (SP1).

So there you have it.  “NEW FEATURE”.  I’ve since uninstalled and rebooted and am back to enjoying NOT having that feature.

Posted in Uncategorized | 6 Comments

Cannot Uninstall VMware Workstation – The MSI ” Failed

Recently, I wanted to update my VMware Workstation version from 8.0.2 to version 8.0.4.  In order to do this you must uninstall the older version of VMware workstation first.  This is where the problems start to arise.

After a bit of prodding and preening, I found this VMware article:
http://kb.vmware.com/selfservice/microsites/search.do?language=en_US&cmd=displayKC&externalId=1031302

Note the following:

Cause
This issue occurs when the Microsoft installer detects a problem with the installation process. This is not a VMware issue. (My emphasis)

There’s only one problem.  I’m able to install and uninstall other programs with impunity.  The ONLY one I can’t uninstall is VMware’s.  More on this later.

So I end up following all of the instructions in the VMware article to NO AVAIL.  Essentially a big waste of time.

Ultimately, I ended up performing the following to get back in business (note, changes to your registry can be detrimental…please backup your registry before performing and adds/deletes/changes):

  1. Found this VMware article (1308) and followed it.  http://kb.vmware.com/selfservice/microsites/search.do?language=en_US&cmd=displayKC&externalId=1308
  2. Following the article was NOT enough.  Here’s the money fix:
  3. I,then, went into regedit and manually performed a search for “VMware Workstation”.  Then I deleted any keys that referenced “VMware Workstation”.  (You do have a backup of your registry before you try this, right?) That is, when you find the value of VMware workstation, delete the entire key above it.

    1. It’s imperative that you delete ALL of these registry keys you find as there is something that the VMware installer is querying and “thinks” is wrong.  I suspect something to do with ProgramData as well as the Uninstaller paths, but have no proof.
  4. I HAD to reboot (I tried running the 8.0.4 installer and it didn’t work).
  5. Once rebooted, I ran the Workstation 8.0.4 installer (again) which proceeded to properly uninstall the 8.0.2 version.
  6. It worked!
  7. Upon the 8.0.4 installation I received some weird installer errors, clicked OK through them, and ultimately, the new version is running properly.

Now, back to Vmware’s comment that “This is not a VMware issue.”

This is poppycock in my estimation.  There is clearly something in their programming of the MSI package that is screwy.  There should be some better error handling as well as descriptives as to what is being interrogated at failure.  I parsed through all the VMware logs i could think of and received NO direction as to the issue.  I ran Process Monitor and Process Explorer as well to see if there was anything sneaky going on.

So if you find yourself in a bind, I hope these steps help you.  They’ve worked on my workstation as well as another friend’s laptop.  Please post here if you’ve had success or failure or have found the root cause of the issue.

Posted in Uncategorized | 12 Comments

Sysprep Errors with Server 2008R2, SkipRearm, and slmgr.vbs – SOLUTION

Have you run into an issue sysprepping  in your virtual or Citrix environment using Vista, Windows 7 or Server 2008 including R2?  Are you getting “Fatal Errors”?  Are you frustrated with the lack of Microsoft knowledge on how to fix the problem?  Or perhaps Microsoft’s lack of commitment to fixing the problem?  Well, look no further.

I’ve run into the same problem recently with my Server 2008 R2 x64 Standard image.  Over the last couple of years, I’ve updated it to include VMware Tools updates as well as various Microsoft updates.  Well, one thing I didn’t know what that Microsoft was keeping track of the “rearming” process.  They only give you three (unless you’re aware of it and can disable it early).

I first ran slmgr.vbs /dlv.  Within a few seconds I could clearly see that I had no rearms left.  Then I searched high and low and tried all the responses from Microsoft employees on the various Microsoft boards as well as some others.  No dice.

Then I was able to piece together a couple of articles and share them here.  Putting both together in the proper order SOLVED my issue.  First, credit is due to these two people/webpages:

  1. Tim at Microsoft – It’s the second entry down and his handle is “butim”.  Here’s the link: http://social.technet.microsoft.com/Forums/en-US/winserversetup/thread/93944526-84e7-4740-a978-15f8c3d56096
    Note: You will need the code from his post
  2. Leonard from the OLEGM blog.  Here’s the link: http://blog.lib.umn.edu/leonard/perl/2011/07/sysprep-your-windows-os-for-more-than-3-times.html

OK, now that credits are out of the way, here’s the solution that FINALLY worked for me:

  1. I had indeed run out of “rearms” and slmgr.vbs /dlv showed 0 for the count.
  2. First, I created the “skiprearm.xml” that was a recommended approach in one of the other articles.  It didn’t work.  But hold on, because you’ll still need it later on.  That article can be found here: click here and you should copy and paste the code and store it where they want.
  3. Next, and this is the MONEYchange….you must check/edit 3 registry keys:
    1. HKEY_LOCAL_MACHINE\SYSTEM\Setup\Status\SysprepStatus\GeneralizationState\CleanupState:2
    2. HKEY_LOCAL_MACHINE\SYSTEM\Setup\Status\SysprepStatus\GeneralizationState\GeneralizationState:7
    3. HKEY_LOCAL_MACHINE\SOFTWARE\Microsoft\Windows NT\CurrentVersion\SoftwareProtectionPlatform\SkipRearm:1
  4. Next, Start -> Run : msdtc -uninstall (wait few seconds)
  5. Start -> Run : msdtc -install (wait few seconds)
  6. Restart the machine
  7. Check the registry for the right registry keys values sysprep with the new XML answerfile
  8. Run the following command from a command prompt:
    1. sysprep /generalize /oobe /shutdown /unattend:c:\Windows\skiprearm.xml

It should now work for you.  And it makes sense because were changing anything Microsoft may have done by skipping rearm, changing the generalization state, then reinstalling MSDTC.

Please let me know if this works for you.

Take Care>>>Dustin

Posted in Computers and Internet | Tagged , , , , , , , | 43 Comments